Hello knitters!
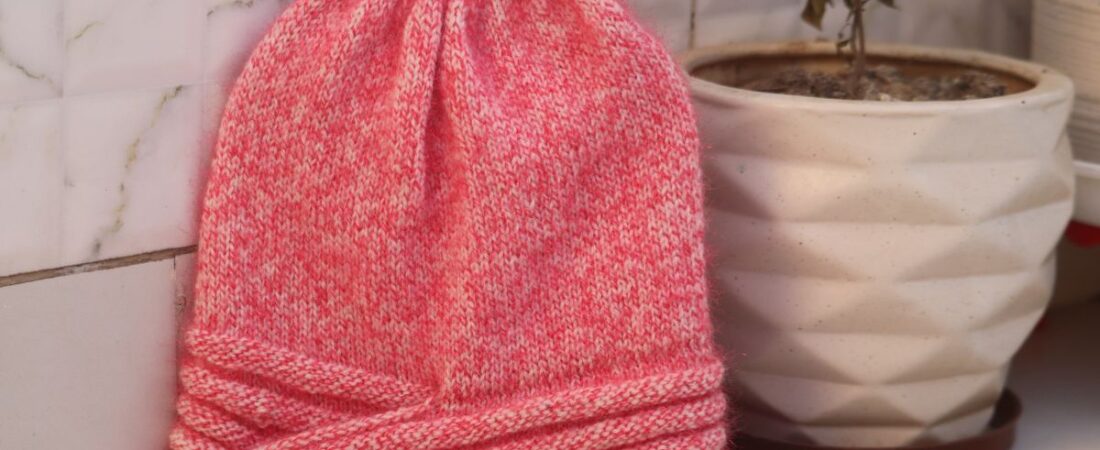
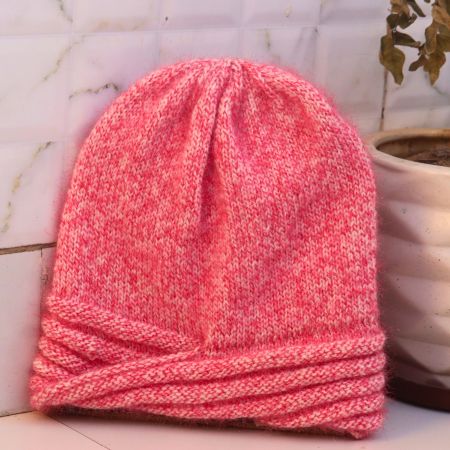
Welcome to another easy beanie knitting tutorial for beginners. Today, I’m sharing a simple twisted rib beanie knitting pattern designed especially for beginners. This beanie is easy to knit, yet once finished, it has a beautifully stylish look. It looks especially lovely on women and girls.
Here, the brim has been twisted, which gives the beanie a very elegant look. The rest of the beanie is knitted using simple knit and purl stitches. If you like, you can also add a different design to the body of the beanie.
This beanie is knitted using straight needles. It uses simple knit and purl stitches, so it can be knitted very quickly. The twisted rib beanie knitting pattern is perfect for beginners, because it only uses basic knit and purl stitches.
So, let’s learn how to knit a twisted rib beanie.
Essential Supplies for Knitting
1- Vardhman Zig Zag Wool Yarn (2 toned colour, Yardage approx 250-275mtrs per 100gms, Reverse 4ply, & Blend: 88% Acrylic / 12% Nylon).
2- 3.25 mm straight knitting needles.
3- Other optional tools are a tape measure, scissors, stitch marker, and yarn needle.
Beginner’s Guide to Knitting Terms and Abbreviations
SL: Slip Stitch/Stitches
K: Knit
P: Purl
STS: Stitches/Stitch
RS: Right Side
WS: Wrong Side
SL2tog: Slip 2 sts together
Twisted Rib Beanie Knitting Pattern with Simple Knit & Purl Stitches
Cast on: 110 sts for Women’s Twisted Rib Beanie with Vardhman Zig Zag Wool Yarn(2 toned color)/3.25 mm straight needle.
Sizes Available: The finished women’s twisted beanie measures about 9 inches overall, with a 3-inch brim and a 6-inch main body, head circumference: 22-24 inches (One size).
Skill Level: Intermediate/Beginner.
Pattern Language: English.
Techniques Used: Cast on 110 stitches and begin working the brim. When the brim reaches the desired length, twist it following the pattern provided below. Continue working the knit and purl pattern for the body until the beanie reaches the required length. Once complete, shape the crown for a women’s beanie, cut the yarn, and neatly sew the edges together to finish.
Twisted Rib Beanie Brim: Step-by-Step Instructions
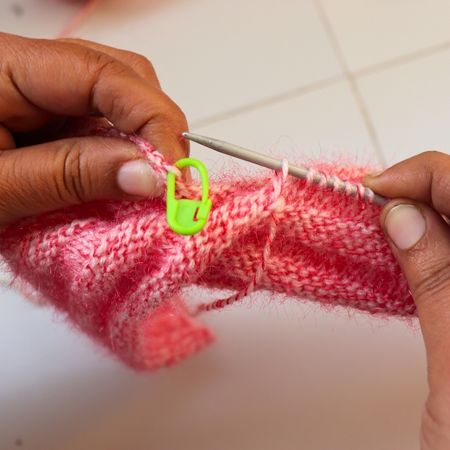
Note: Before starting the brim, place a stitch marker at the center stitches. For example, since I have 110 stitches here, I placed the marker at the 55th stitch.
Row 1(RS)- Purl all sts
Row 2(WS)- Knit all sts
Row 3(RS)- Purl all sts
Row 4(WS)– Knit all sts
Row 5(RS)- Knit all sts
Row 6(WS)- Purl all sts
Row 7(RS)- Knit all sts
Row 8(WS)- Purl all sts
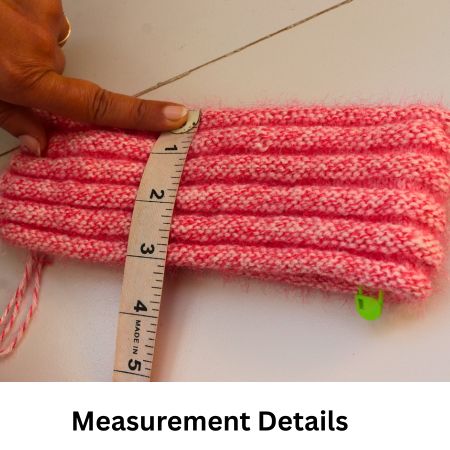
Repeat these 8 rows until you reach 3 inches. I have knitted 5 full patterns and 4 additional rows to reach this length.
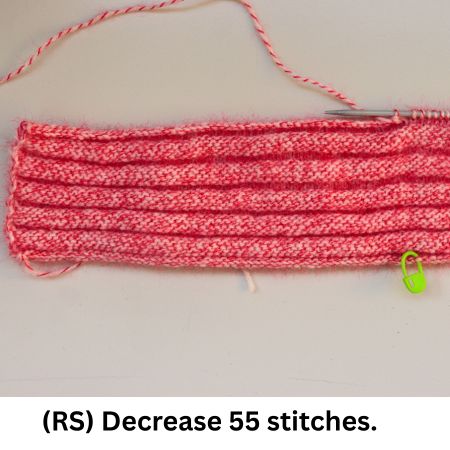
How to Twist the Rib Brim – Step-by-step process.
Now, it’s time to twist the brim of your beanie to give it a neat, finished look. Next, decrease 55 stitches. Pick up stitches from the bottom, taking stitches along each edge.
RS- Decrease 55 stitches (decrease half of the total stitches so the brim).
Next, prepare to pick up stitches from the bottom edge of the beanie.
Start picking up stitches from the point where the stitch marker is placed.
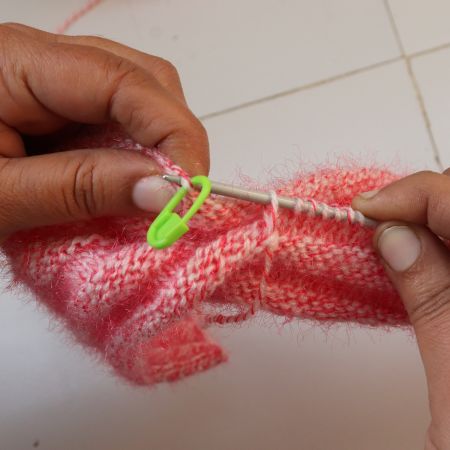
Pick up stitches evenly from each edge so the twist looks balanced and clean.
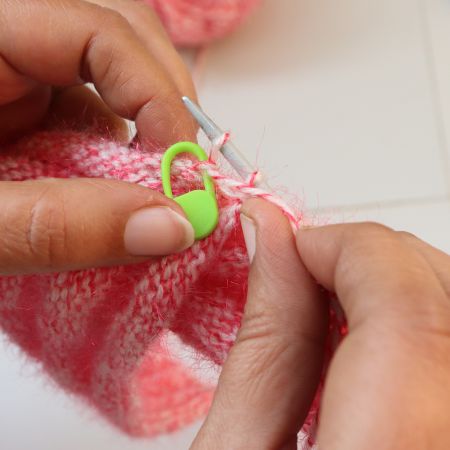
Pick up all the stitches, the brim is now twisted (crossover).
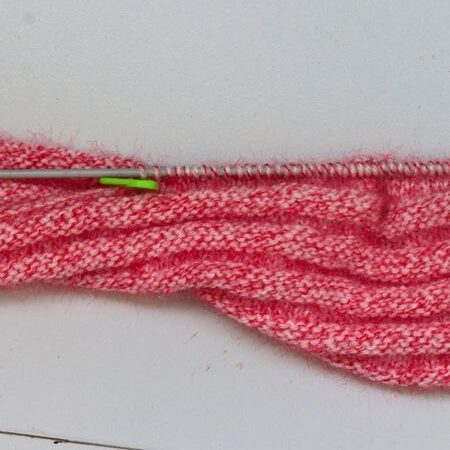
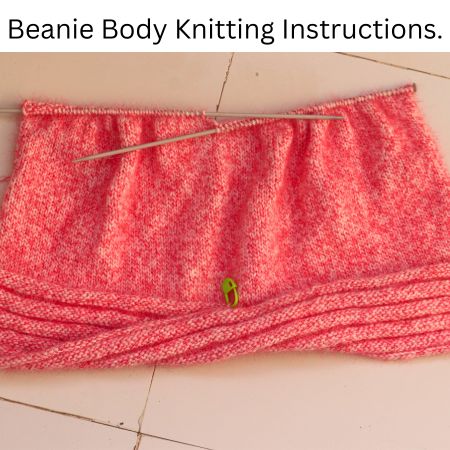
Twisted Rib Beanie Body: Easy Knit & Purl Pattern
Complete the body of the beanie using basic knit and purl stitches.
RS- knit all stitches
WS- Purl all stitches
Repeat the knit and purl rows to complete the length of the beanie. I have completed 6 inches above the brim.
Shaping the Crown of the Twisted Rib Beanie
Once the twisted women’s rib beanie has reached the desired length, it’s time to shape the crown. Follow the pattern below.
Row 1(RS): K3, * SL2tog, K1, both slip sts over the knit sts, K7 * repeat from * to * ……………. last 7 sts SL2tog, K1, both slip sts over the knit sts, K4
Now there are a total of 88 stitches remaining.
Row 2(WS): Purl all sts
Row 3(RS): K2, * SL2tog, K1, both slip sts over the knit sts, K5 * repeat from * to * ……………. last 6 sts SL2tog, K1, both slip sts over the knit sts, K3
Now there are a total of 66 stitches remaining.
Row 4(WS): Purl all sts
Row 5(RS): K1, * SL2tog, K1, both slip sts over the knit sts, K3 * repeat from * to * ……………. last 5 sts SL2tog, K1, both slip sts over the knit sts, K2
Now there are a total of 44 stitches remaining.
Row 6(WS): Purl all sts
Row 7(RS): * SL2tog, K1, both slip sts over th knit sts, K1 * repeat from * to * ……………………
Now there are a total of 22 stitches remaining.
Row 8(WS): Purl all sts
Row 9(RS): * K1, SL2tog, K1, both slip sts over the knit sts * repeat from * to * ……………. last 2 sts K2
Now there are a total of 12 stitches remaining.
Row 10(WS): Purl all sts
Since this twisted rib beanie is knitted using straight needles, it needs to be seamed. Thread the remaining 12 stitches onto a sewing needle, then pull the yarn tightly to close and secure the top. Finally, seam the beanie along the side, and your twisted rib beanie is ready to wear.
Twisted Rib Beanie Knitting Pattern – Final Thoughts
How did you like this women’s twisted rib beanie knitting pattern tutorial? Please let me know in the comments. To learn more knitting headgear projects like this, you can visit our website. I’ve also shared many more beanie and headband projects there for you. If you like my knitting tutorials, I’d really appreciate it if you shared them with others.
Beginner FAQs for the Twisted Rib Beanie Knitting Pattern
Is the twisted brim difficult to knit?
No! The twisted brim is easy to knit, even for beginners. Just follow the step-by-step instructions provided in the pattern.
Do I need a stitch marker for the twisted brim?
Yes, it helps you keep track of the center stitches for the twist.
Can I adjust the brim width?
Yes, knit fewer or more rows for a narrower or wider brim.
Can I get this twisted rib beanie pattern in PDF format?
Currently, there’s no official PDF version. The pattern is fully available online for easy copy-pasting or viewing on your device.
Leave a Reply