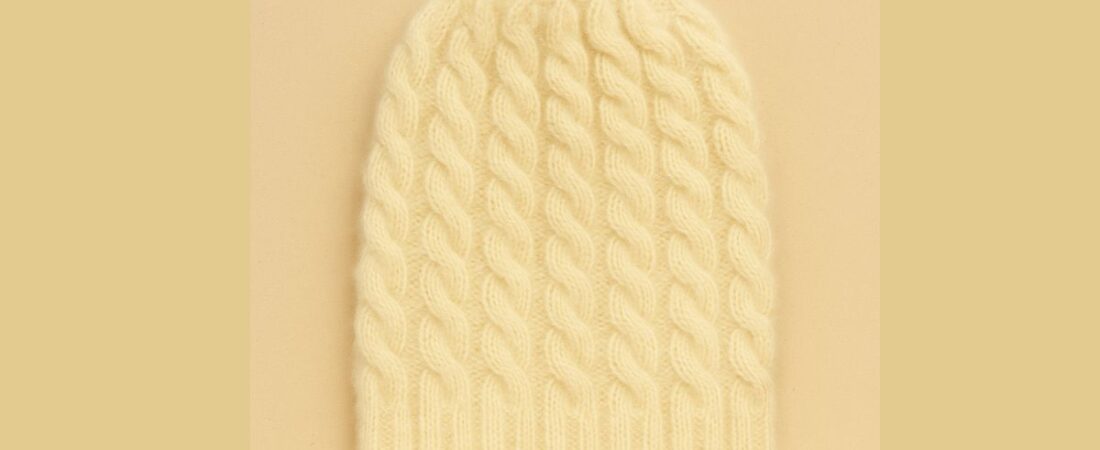
Hello friends! Welcome to my new Classic Cable Knit Hat Pattern Tutorial. In today’s post, we will learn how to knit a beautiful and stylish baby hat with an easy cable design.
The cable pattern used in this hat is very simple to knit and gives a lovely, elegant look after finishing. For knitting this hat, I have used straight needles. Here, I’ve used straight knitting needles in sizes 3.25 mm and 3.5 mm.
Since we are adding a cable pattern, we will need to cast on a few extra stitches. So, let’s begin and learn how to knit a Classic Cable Knit Hat for babies!
Materials Needed for the Baby Cable Knit Hat
1: Oswal Tarang Knitting 3 Ply Knitting Yarn Wool (3 strands of different/separate yarns, Yardage Approx. 250mtrs per 100gm Ball, 100% Polyester).
2: Use a 3.25 mm straight needle for the brim, and a 3.5 mm straight needle for the body and crown.
3: Other optional tools are a tape measure, scissors, cable needle, and yarn needle.
Knitting Abbreviations Used in This Pattern
Check out the detailed list of knitting abbreviations, I’ve shared them on my blog to help you follow patterns easily!
C6F: Cable 6 Front
K2tog: Knit 2 sts together
SL: Slip Stitch/Stitches
K: Knit
P: Purl
STS: Stitches/Stitch
RS: Right Side
WS: Wrong Side
Simple and Stylish Classic Cable Hat Knitting Instructions
Cast on: 105 sts (with Oswal Tarang Knitting 3 Ply Knitting Yarn Wool, 3 strands of different/separate yarns), This pattern uses 3-ply wool with cable, you’ll notice the stitch count is a bit higher.
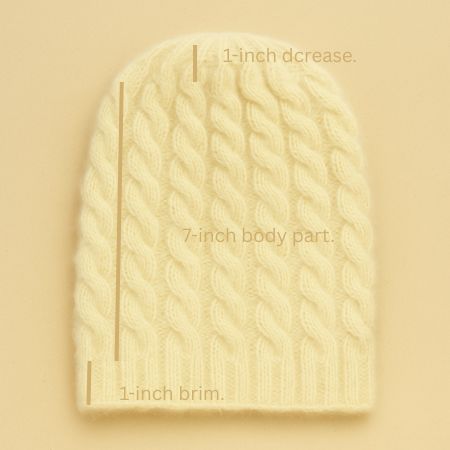
Sizes Available: The baby hat (up to 10 years, 20 Inch head circumference) measures about 9 inches in total (1-inch brim, 7-inch body, and 1-inch crown). It’s a slouchy style, but you can shorten the length if you prefer a snug fit.
Skill Level: Easy/Beginner.
Pattern Language: English.
Techniques used: Basic knitting skills- casting on, 2X2 Rib Stitch for brim, Knit the main body of the project using the cable pattern, Shape your project by decreasing stitches & Join your work neatly to finish the project.
Baby Cable Hat Brim Knitting Instructions
The brim of the hat is knitted in a simple 2×2 rib stitch. For the border, I used 3.25 mm straight knitting needles.
The border pattern is provided below.
Row 1: * P2, K2* repeat from * to * …………….. last 4 sts P2, K1, P1
Row 2: SL1(P), * P2, K2 * repeat from * to * …………. last 3 sts P2, K1, P1
Repeat these 2 rows until you complete a total of 10 rows or a 1-inch border.
Easy Classic Cable Pattern for the Baby Hat Body
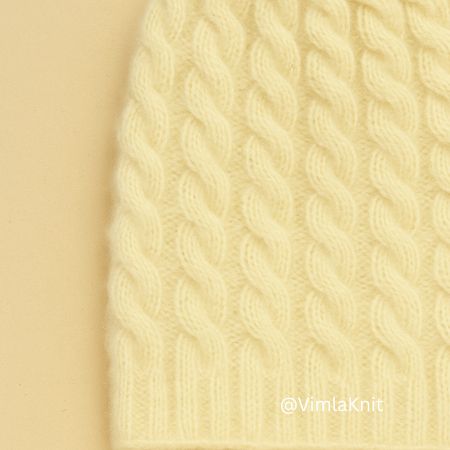
To knit the cable, we will use 3.5 mm straight knitting needles to keep the top of the hat tight and neat. The cable pattern used in this hat is worked over 8 stitches.
For the hat, the stitches are cast on in multiples of 8, with 1 extra stitch added for the edge. The design follows an 8-row repeat pattern.
Let’s learn how to knit the cable!
Row 1: * P2, K6 * repeat from * to * ………….. last sts P1
Row 2: SL1(P), * P6, K2 * repeat from * to * ………. last 8 sts P6, K1, P1
Row 3: Same as row 1
Row 4: Same as row 2
Row 5: Same as row 1
Row 6: Same as row 2
Row 7: * P2, C6F * repeat from * to * ……………… last sts P1
Row 8: Same as row 2
Repeat these 8 rows until you reach the desired length of the hat. For this hat, I have knitted approximately 8 inches (1-inch border + 7-inch design section), completing 8 full pattern repeats.
Baby Hat Crown Shaping and Decrease Instructions
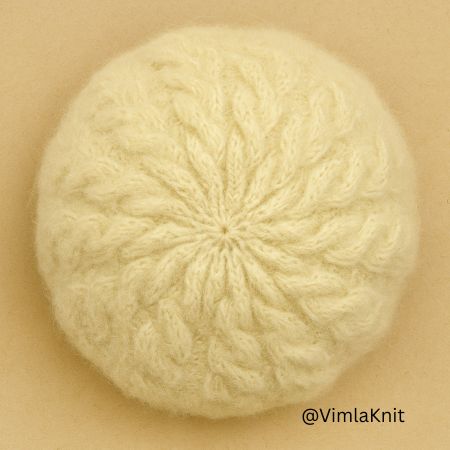
The crown of the hat is decreased following the cable pattern, ensuring the top of the hat looks neat and stylish. The bind-off pattern is provided below.
Row 1: P2, K2tog, K2, K2tog * repeat from * to * ………… last sts P1
Now, a total of 79 stitches remain.
Row 2: SL1(P), * P4, K2 * repeat from * to * …………… last 6 sts P4, K1, P1
Row 3: * P2, K2tog, K2tog * repeat from * to * ……….. last sts P1
Now, a total of 53 stitches remain.
Row 4: SL1(P), * P2, K2 * ………… last 6 sts P2, K1, P1
Row 5: * P2, K2tog * repeat from * to * …………. last sts P1
Now, a total of 40 stitches remain.
Row 6: SL1(P), * P1, K2 * repeat from * to * ……….. last 3 sts P1, K1, P1
Row 7: * P2tog, K1 * repeat from * to * …………. last sts P1
Now, a total of 27 stitches remain.
Row 8: SL1(P), * P1, K1 * repeat from * to * ……………. last 2 sts P2
Row 9: P2tog, P2tog, P2tog ……………. last sts P1
Now, a total of 14 stitches remain.
Row 10: Purl all sts
After decreasing the stitches, when 14 stitches remain, cut the yarn and thread it through a string (or tapestry) needle , then secure the remaining stitches tightly.
Next, sew the hat along the side edges, picking up the edge stitches to finish your baby cable knit hat neatly.
Conclusion: Finishing Your Baby Cable Knit Hat
Thank you for following this baby cable knit hat tutorial! We hope you enjoyed learning how to knit this cute and stylish baby cable hat from the brim to the crown. Don’t forget to share your finished hat projects with us on Facebook – we would love to see your beautiful creations!
Happy knitting and stay creative!
Frequently Asked Questions (FAQ) About Baby Cable Knit Hat
Can I adjust the size for different ages?
Yes, increase or decrease the cast-on stitches and pattern repeats to adjust the hat size.
Can I make a pom-pom for the hat?
Yes, a small pom-pom adds a cute finishing touch.
How do I sew the hat?
Use a tapestry needle and pick up edge stitches along the sides to sew the hat neatly.
How long should the hat be?
For a baby, the total hat length is about 9 inches (1-inch brim, 7-inch body, 1-inch crown). It’s a slouchy style, but you can shorten the length as needed.
Leave a Reply