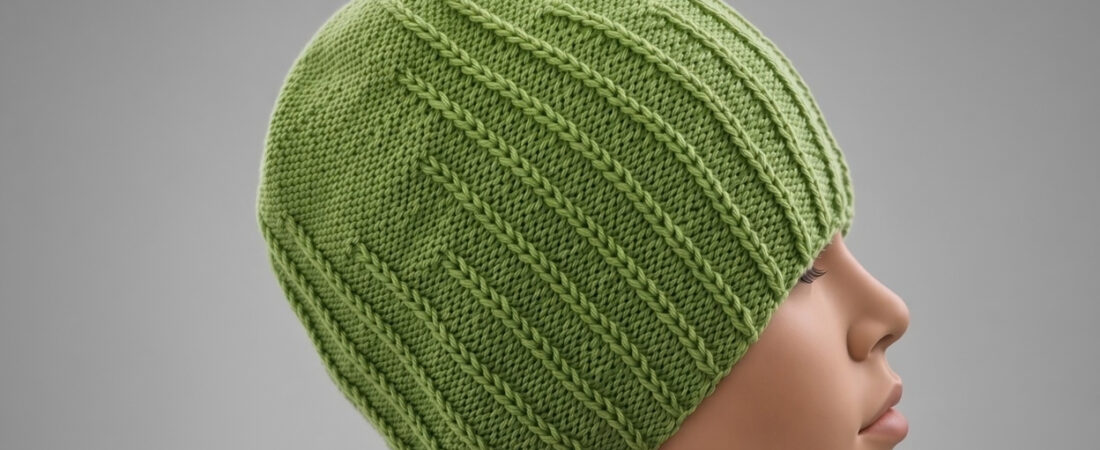
Hello friends! Welcome to Vimla Knit. Today I have a new easy beanie knitting pattern for you. This unisex beanie is so simple that even beginners can make it without any trouble.
This beanie does not have a separate border. It starts with its main design right from the first row. That is why it looks modern and smart.
We are using simple straight needles to make this beanie. You only need 3 easy steps to finish it. In this blog, I have explained every step in very simple words, so you can follow along easily. So pick up your yarn and needles, and let’s start knitting this beautiful unisex beanie together!
What You’ll Need for This Easy Beanie Knitting Pattern
Vardhman Woolista Merino Wool Yarn (4 ply/stranded, 8 ply thickness, 100% pure merino wool, Yardage approx. 180-200 mtrs per 100gm ball).
Straight knitting needles (3.25 mm)
A tapestry/yarn needle for seaming
A tape measure
Scissors
Knitting Terms Every Beginner Should Know
SL: Slip Stitch/Stitches
K: Knit
P: Purl
STS: Stitches/Stitch
RS: Right Side
WS: Wrong Side
K2tog: Knit 2 stitches together
P2tog: Purl 2 stitches together
P3tog: purl 3 stitches together
SL2tog: Slip 2 stitches together
YB: Yarn in back
How to Knit This Unisex Beanie Pattern (Step by Step)
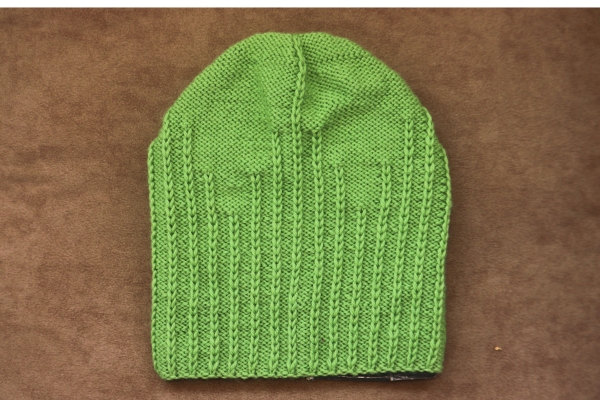
Casting On: Cast on 120 stitches using Vardhman Woolista Merino Wool Yarn and 3.25mm straight needles.
Finished Size & Fit: This unisex beanie measures approximately 8.5 inches in total length and is designed to fit a 22–23 inch head circumference comfortably, making it a great one-size-fits-most option for adults.
Skill Level: Beginner to Intermediate
Pattern Language: English
Techniques Used: Cast on 120 stitches and begin the main design right from the first row. Continue knitting until the beanie measures approximately 8 inches in total length. After completing the crown decreases, cut the yarn, leaving a long tail. Thread the tail through the remaining stitches, pull tight to close the crown, and sew the side seam neatly using the mattress stitch or your preferred seaming method to finish the beanie.
Knitting the Beanie Design (Main Body)
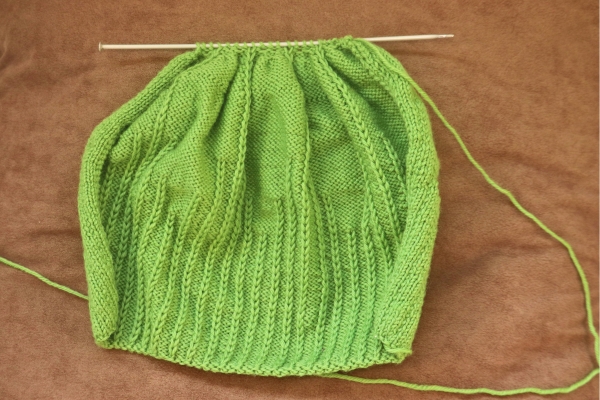
First, we will knit the first part of the beanie. Since this knit and purl beanie does not have a border, we will cast on the stitches and go straight into the main design.
The design in this beanie is a mix of rib and garter stitches, which makes a vertical line pattern from bottom to top. As we knit higher up, these straight lines slowly disappear one by one, and the space between them turns into a plain, smooth texture.
The bottom part of the beanie has ribbing, which keeps it stretchy and gives it a nice, snug fit. This makes it a great simple hat pattern for beginners, and since it’s a unisex beanie pattern, anyone can wear it.
The full pattern details are given below.
Row 1(RS): SL1(P), P1, * YB, SL1(P), P3 * repeat from * to * ………………last 2 sts YB, SL1(P), P1
Row 2(WS): SL1(P), * P1, K3 * repeat from * to * ……… last 3 sts P1, K1, P1
Keep repeating rows 1 and 2 until you complete row 40.
Row 41(RS): SL1(P), P1, ( YB, SL1(P), P3 ) 2 times, * YB, SL1(P), P7, ( YB, SL1(P), P3 ) 4 times * repeat from * to * …………….. last 14 sts YB, SL1(P), P7, YB, SL1(P), P3, YB, SL1(P), P1
Row 42(WS): SL1(P), P1, K3, * P1, K7, ( P1, K3 ) 4 times * …………….. last 19 sts P1, K7, P1, K3, P1, K3, P1, K1, P1
Keep repeating rows 41 and 42 until you complete row 50.
Row 51(RS): SL1 (P), * YB, SL1(P), P3, YB, SL1(P), P15, YB, SL1(P), P3 * repeat from * to * ……………. last repeat ending with P1
Row 52(WS): SL1(P), * P1, K15, P1, K3, P1, K3 * repeat from * to * ……………….. last repeat P1, K15, P1, K3, P1, K1, P1
Keep repeating rows 51 and 52 until you complete row 60.
Row 61(RS): SL1(P), P1, * YB, SL1(P), P23 * ………….. repeat from * to * …..……….. last repeat YB, SL1(P), P21
Row 62(WS): SL1(P), K20, * P1, K23 * repeat from * to * …………..last 3 sts P1, K1, P1
Repeat rows 61 and 62 until row 76, or until the beanie measures 8 inches. You can repeat these two rows a few more times if you want to make the beanie a little longer.
Shaping the Crown to Finish Your Knit and Purl Beanie
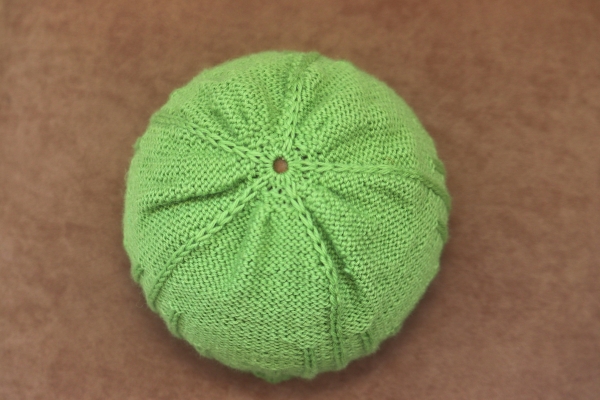
Once the beanie reaches the length you want, we will start knitting the next part. In this part, we will decrease stitches to shape the top of the beanie into a round, neat crown.
Over the next 12 rows, we will slowly decrease the stitches following this pattern. This gives the beanie a nice, rounded shape and a clean, professional finish. The full decrease pattern is explained below in detail.
Row 1(RS): P2tog, * YB, SL1(P), YF, P2tog, P19, P2tog * repeat from * to * ………….. last repeat YB, SL1(P), YF, P2tog, P19
Now, 110 stitches are remaining.
Row 2(WS): SL1(P), K19, * P1, K21 * repeat from * to * ……… last 2 sts P2
Row 3(RS): SL1(P), * YB, SL1(P), YF, P2tog, P17, P2tog * repeat from * to *………… last repeat YB, SL1(P), YF, P2tog, P16, P2tog
Now, 100 stitches are remaining.
Row 4(WS): SL1(P), K17, * P1, K19 * repeat from * to * ……….. last 2 sts P2
Row 5(RS): SL1(P), * YB, SL1(P), YF, P2tog, P15, P2tog * repeat from * to *………. last repeat YB, SL1(P), YF, P2tog, P14, P2tog
Now, 90 stitches are remaining.
Row 6(WS): SL1(P), K15, * P1, K17 * repeat from * to * ……….. last 2 sts P2
Row 7(RS): SL1(P), * YB, SL1(P), YF, P2tog, P13, P2tog * repeat from * to *…………… last repeat YB, SL1(P), YF, P2tog, P12, P2tog
Now, 80 stitches are remaining.
Row 8(WS): SL1(P), K13, * P1, K15 * repeat from * to * ……….. last 2 sts P2
Row 9(RS): SL1(P), * YB, SL1(P), YF, P2tog, P2tog, P2tog, P3tog, P2tog, P2tog, P2tog * repeat from * to * ………………. last repeat YB, SL1(P), YF, P2tog, P2tog, P2tog, P3tog, P2tog, P2tog, P1
Now, 41 stitches are remaining.
Row 10(WS): SL1(P), K6, * P1, K7 * repeat from * to * …………. last 2 sts P2
Row 11(RS): SL1(P), * YB, SL1(P), YF, P2tog, P3tog, P2tog * repeat from *to * ……………….
Now, 21 stitches are remaining.
Row 12(WS): SL1(P), K2, ( P1, K3 ) 4 times, P2
After all the decreases, 21 stitches will be left on the needle. Now cut the yarn, leaving a long enough tail, and thread it through a yarn needle. Pass the needle through all 21 remaining stitches, pull them tight, and tie a secure knot.
Finally, sew both edges of the beanie together neatly using the needle. Once the sewing is done, cut off any extra yarn.
If you want to learn how to sew your beanie using mattress stitch, check out this detailed video tutorial: (Mattress Stitch to Sew Your Simple Beanie)
Your easy beanie knitting pattern is now complete and ready to wear!
Your Free Beanie Pattern Is Ready to Wear
I hope you liked today’s blog and enjoyed knitting along with me. Please tell us in the comments how this easy beanie knitting pattern turned out for you. Did you find it easy to follow? Was the crown shaping simple for you? I would love to know all about your experience.
Once your beanie is ready, please don’t forget to share your latest project with us on Instagram and Ravelry. Seeing your finished beanies always makes my day, and it also helps other beginners feel more confident to try this pattern too.
If this is your first time visiting our blog, welcome! We are truly glad you found us. Please take a few minutes to explore our website and look around at our other patterns. We have many more free beanie pattern posts waiting for you, and I am sure you will find something you love.
That brings us to the end of today’s blog. Thank you so much for reading till the end and for knitting along with me. I will be back soon with a brand new project for you. Until then, take care of yourself, keep your needles busy, and happy knitting. Bye-bye for now!
FAQs About This Easy Beanie Knitting Pattern for Beginners
Can I use a different yarn brand for this pattern?
This pattern uses Vardhman Woolista Merino Wool Yarn. You can use any yarn brand you like, as long as it is a similar weight to the one used here. But if you choose a different yarn weight, you can adjust the number of stitches to match it.
Can I use circular needles instead of straight needles?
Yes, if you are more comfortable with circular needles, you can use them instead. If you make this change, please share how you adjusted the pattern in the comments, so other knitters can follow the same method too.
Is this beanie slouchy or fitted?
This beanie has a fitted shape, not a slouchy one.
Can I share a photo of my finished beanie?
Yes, please! Once you finish knitting this beanie, share your photo with us on Instagram or Ravelry — we would love to see it.
Leave a Reply