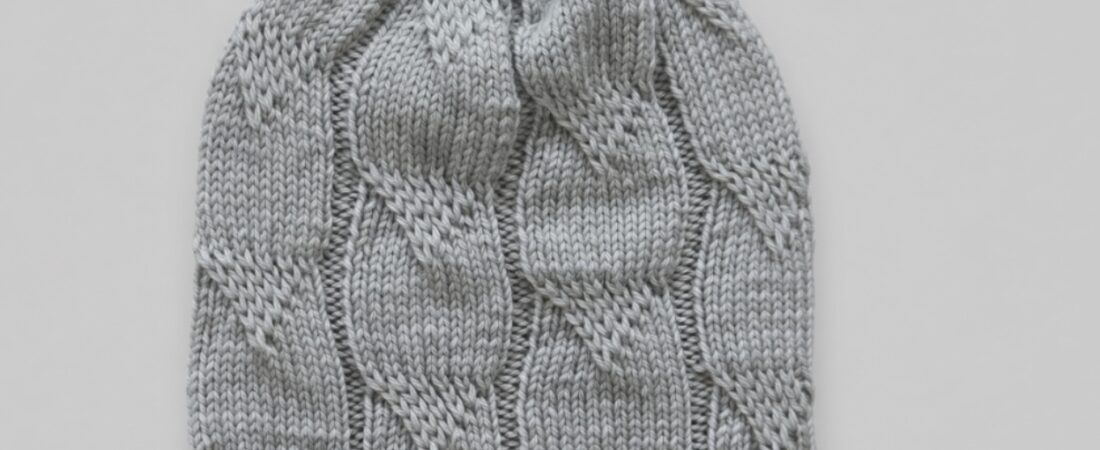
Learn this easy flat cable beanie pattern for beginners. A simple cable beanie knit pattern using straight needles, no circular needles needed.
Hello friends, welcome back to Vimla Knit! Today I have an easy flat cable beanie pattern for you.
If you’ve been searching for a flat cable beanie knit pattern, you’ve probably noticed most cable hat patterns are written for circular needles. This guide is different. This entire beanie is knit flat, using only straight needles, so you don’t need to worry about magic loop, double-pointed needles, or joining in the round. Once your knitting is done, you’ll sew up one simple seam, and your beanie is ready to wear.
I’ve explained the whole pattern in simple, clear steps so it’s easy to follow. So grab your yarn and needles, and let’s start knitting this gorgeous beanie together!
What You’ll Need to Knit This Cable Beanie
Vardhman Woolista Merino Wool Yarn (4 ply/stranded, 8 ply thickness, 100% pure merino wool, Yardage approx. 180-200 mtrs per 100gm ball).
Straight knitting needles (3.25 mm)
A cable needle
A tapestry/yarn needle for seaming
A tape measure
Scissors
Common Knitting Terms Used in This Beanie Pattern
SL: Slip Stitch/Stitches
K: Knit
P: Purl
STS: Stitches/Stitch
RS: Right Side
WS: Wrong Side
K2tog: Knit 2 stitches together
P2tog: Purl 2 stitches together
SL2tog: Slip 2 stitches together
T2F: Twist 2 Front (Slip the next stitch onto a cable needle and hold it at the front of the work, purl the next stitch from the left-hand needle, then knit the stitch from the cable needle).
SSK: Slip Slip Knit
For a full list of knitting abbreviations, check out my complete abbreviations guide, it covers most of the term used in this and other patterns on Vimla Knit.
Why This Flat Cable Beanie Pattern Is Different
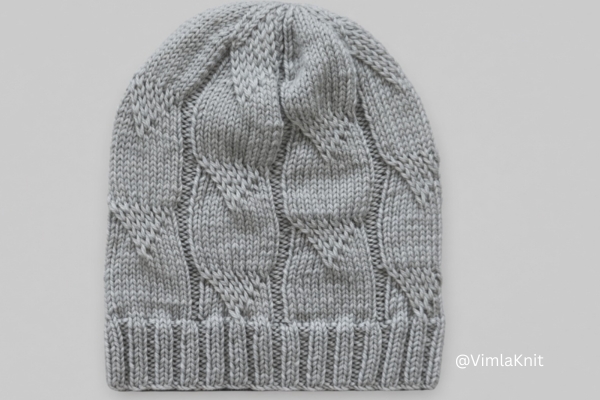
Casting On: Cast on 114 stitches using Vardhman Woolista Merino Wool Yarn and 3.25mm straight needles to begin this cable knit beanie pattern.
Finished Size & Fit: This unisex beanie measures approximately 8.5 inches in total length and gives a fitted, comfortable fit for a 22-inch head circumference, making it a great one-size-fits-most option for adults.
Skill Level: Beginner to Intermediate
Pattern Language: English
Techniques Used: Cast on 114 stitches and work in 2×2 rib (K2, P2) until the brim measures 1.5 inches, or your preferred length. Then switch to the cable pattern and continue knitting until the total length reaches 8 inches (1.5 inches brim + 6.5 inches body). Once the crown shaping is done, cut the yarn leaving a long tail, and sew the edges together neatly using mattress stitch or your preferred seaming method to finish this beginner-friendly beanie.
How to Knit the Brim for This Flat Cable Beanie Pattern
After casting on, we’ll start the beanie by knitting the brim first. The brim gives the beanie a good grip on your head, and it also adds stability to the design pattern that comes after it. Here, I’ve used a simple but very popular 2×2 rib stitch for the brim. It looks smart and stylish, and it’s also very easy to knit.
So let’s start knitting the brim for this flat cable beanie pattern
Row 1(RS): * K2, P2 * repeat from * to * …………. last 2 sts K2
Row 2(WS): * P2, K2 * repeat from * to * …………. last 2 sts P2
Repeat these rows until your brim reaches the length you want. For this beanie, I knit a 1.5-inch border, which came out to 14 rows total.
Row 14(RS): Purl all sts
Step-by-Step Cable Design for This Cable Beanie Knit Pattern
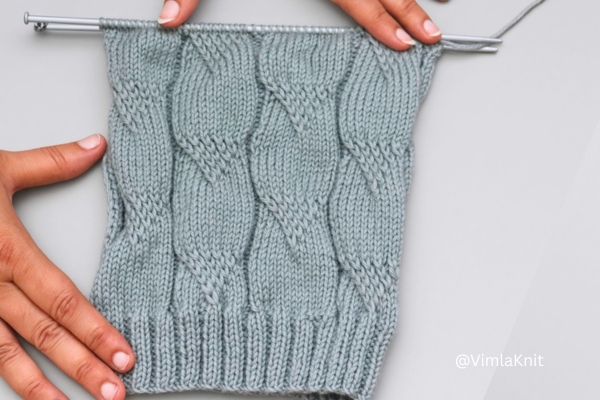
After we finish the brim, we knit the cable part of this flat cable beanie pattern. To make the cable, we twist the stitches. This makes a curvy, rope-like shape. We also add small purl stitches next to it. This makes the cable stand out and look raised.
This cable beanie knit pattern has 28 stitches and 24 rows. You repeat it again and again. It may sound big, but it is easy once you start. Later in this post, I will show you how to change this design too. So keep knitting with me!
Row 1(RS ): SL1(P), * P2, K5, T2F (K1, SL1 ), K5, P2, K12 * repeat from * to * ………………………last sts P1
Row 2(WS): SL1(P), * P12, K2, P12, K2 * repeat from * to * ……………. last sts P1
Row 3(RS): SL1(P), * P2, K4, ( T2F- K1, SL1 ) 2 times, K4, P2, K12 * repeat from * to * …………………. last sts P1
Row 4(WS): Same as row 2
Row 5(RS): SL1(P), * P2, K3, ( T2F- K1, SL1 ) 3 times, K3, P2, K12 * repeat from * to * …………………. last sts P1
Row 6(WS): Same as row 2
Row 7(RS): SL1(P), * P2, K2, ( T2F- K1, SL1 ) 4 times, K2, P2, K12 * repeat from * to * …………………. last sts P1
Row 8(WS): Same as row 2
Row 9(RS): SL1(P), * P2, K1, ( T2F- K1, SL1 ) 5 times, K1, P2, K12 * repeat from * to * …………………. last sts P1
Row 10(WS): Same as row 2
Row 11(RS): SL1(P), * P2, ( T2F- K1, SL1 ) 6 times, P2, K12 * repeat from * to * ………… last sts P1
Row 12(WS): Same as row 2
Row 13(RS): SL1(P), * P2, K12, P2, K5, ( T2F – K1, SL1 ), K5 * repeat from * to * ……………… last sts P1
Row 14(WS): Same as row 2
Row 15(RS): SL1(P), * P2, K12, P2, K4, ( T2F – K1, SL1 ) 2 times, K4 * repeat from * to * ……………… last sts P1
Row 16(WS): Same as row 2
Row 17(RS): SL1(P), * P2, K12, P2, K3, ( T2F – K1, SL1 ) 3 times, K3 * repeat from * to * ……………… last sts P1
Row 18(WS): Same as row 2
Row 19(RS): SL1(P), * P2, K12, P2, K2, ( T2F – K1, SL1 ) 4 times, K2 * repeat from * to * ……………… last sts P1
Row 20(WS): Same as row 2
Row 21(RS): SL1(P), * P2, K12, P2, K1, ( T2F – K1, SL1 ) 5 times, K1 * repeat from * to * ……………… last sts P1
Row 22(WS): Same as row 2
Row 23(RS): SL1(P), * P2, K12, P2, ( T2F – K1, SL1 ) 6 times * repeat from * to * ……………… last sts P1
Row 24(WS): Same as row 2
Repeat these 24 rows until you reach your desired length for this cable beanie pattern. For this beanie, I knit a total of 8 inches — 1.5 inches for the brim and 6.5 inches for the cable design. That worked out to 2 complete pattern repeats plus 12 extra rows.
Decreasing Stitches to Shape the Beanie Crown
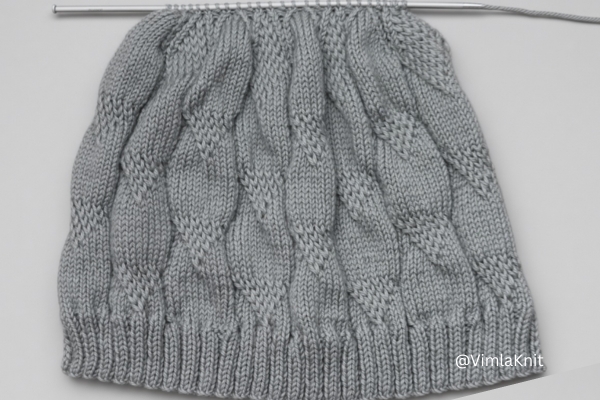
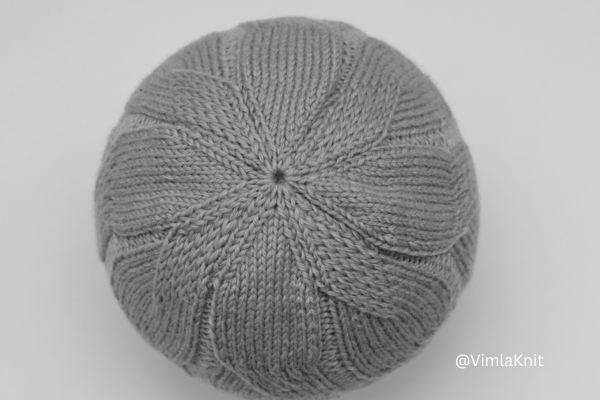
Once the length of the beanie is complete, we’ll start decreasing the stitches for this beginner cable beanie. The bind-off here takes 12 rows to complete, so keep in mind that the beanie’s total length will grow a little more even after you start decreasing.
We’ll keep following the same cable design while decreasing. This gives the beanie a clean, finished look, almost like a store-bought hat. Below, I’ve shared the full decrease pattern for this cable beanie knit pattern, so let’s start shaping the crown.
Row 1(RS): SL1(P), * P2tog, K1, ( T2F – K1, SL1 ) 5 times, K1, P2tog, K12 * repeat from * to * ………………… last sts P1
Now I have 106 stitches remaining.
Row 2(WS): SL1(P), * P12, K1, P12, K1 * repeat from * to * ………… last sts P1
Row 3(RS): SL1(P), * P1, SSK, ( T2F – K1, SL1 ) 4 times, K2tog, P1, SSK, K8, K2tog * repeat from * to * ……………… last sts P1
Now I have 90 stitches remaining.
Row 4(WS): SL1(P), * P10, K1, P10, K1 * repeat from * to * …………… last sts P1
Row 5(RS): SL1(P), * P1, SSK, ( T2F – K1, SL1 ) 3 times, K2tog, P1, SSK, K6, K2tog * repeat from * to * ……………… last sts P1
Now I have 74 stitches remaining.
Row 6(WS): SL1(P), * P8, K1, P8, K1 * repeat from * to * ………….. last sts P1
Row 7(RS): SL1(P), * P1, SSK, ( T2F – K1, SL1 ) 2 times, K2tog, P1, SSK, K4, K2tog * repeat from * to * ……………. last sts P1
Now I have 58 stitches remaining.
Row 8(RS): SL1(P), * P6, K1, P6, K1 * repeat from * to * ……………… last sts P1
Row 9(RS): SL1(P), * P1, SSK, ( T2F – K1, SL1 ), K2tog, P1, SSK, K2, K2tog * repeat from * to * …………….. last sts P1
Now I have 42 stitches remaning.
Row 10(WS): SL1(P), * P4, K1, P4, K1 * repeat from * to * …………… last sts P1
Row 11(RS): SL1(P), * P1, SSK, K2tog, P1, SSK, K2tog * repeat from * to * …………………………… last sts P1
Now I have 26 stitches remaning.
Row 12(WS): SL1(P), * P2, K1, P2, K1 * repeat from * to * ……………… last sts P1
While shaping the crown of this flat cable beanie pattern, stop knitting once 26 stitches remain on the needle. Cut your yarn, leaving a 10-inch (25 cm) tail. Thread it onto your tapestry needle and pull it through all remaining live stitches. Pull tight and secure with a couple of small stitches through the center.
Using your long cast-on tail, sew the side seam closed with mattress stitch, working from the brim up to the crown. Mattress stitch creates a nearly invisible seam and keeps your ribbing looking continuous around the hat.
Video Tutorial: Thanks to Knitting Design Pattern Idea for the inspiration behind this beginner cable beanie knit pattern. A free video tutorial is available if you’d like to follow along visually.
Your Beginner Cable Knit Beanie is Ready to Wear
I really hope you loved this flat cable beanie pattern. Before I wrap up today’s post, I want to say this — if this is your first time visiting Vimla Knit, do check out my website. You’ll find many more free knitting patterns here, and I’m sure they’ll inspire you to try something new.
If you’re one of my regular readers, please share your thoughts in the comments. Your support means the world to me, and it’s what keeps me going. If you knit this cable beanie knit pattern in the round instead of flat, please share your version in the comments. It will really help other knitters who prefer circular needles.
And don’t forget to tag me on Instagram with your handknit projects. I’d love to see your version of this beanie! That’s all for today. I’ll be back soon with a new and unique project. Until then, take care, stay happy, and keep your needles busy. Bye-bye!
Check Out Our Other Free Beginner Cable Beanie Pattern
Free Spiral Rib Cable Beanie Pattern for Beginners
Easy Cable Beanie Pattern Using Straight Needles
Free Baby Cable Beanie Pattern – Classic Knit Hat
Unisex Cable Rib Beanie Pattern – Free Knit Guide
FAQ: Flat Cable Beanie Pattern for Beginners
How do I know what size to knit?
Measure your head circumference and match it to the pattern’s stitch count for your closest size.
Why do we decrease gradually instead of all at once?
Gradual decreasing keeps the crown rounded and smooth, rather than pointy or uneven.
What seam is best for a flat cable beanie pattern?
Mattress stitch works best, since it creates a nearly invisible seam that keeps the ribbing looking continuous.
What is a flat cable beanie pattern?
A flat cable beanie pattern is knit back and forth in rows on straight needles, rather than in the round on circular needles, and finished with a single seam.
One response to “Flat Cable Beanie Pattern – Free Easy Knit Guide for Beginners.”
-
Je tiens à vous remercier pour le patron de tricot, c’est vraiment génial. Le fait que le bonnet se tricote à plat me permet de mieux ajuster sa taille.

Leave a Reply