Hello dear Knitters! Welcome to Vimla Knit. In today’s post, we’re bringing you a very easy and beautiful tutorial for the Easy Ribbed Knit Beanie Hat Pattern for Beginners.
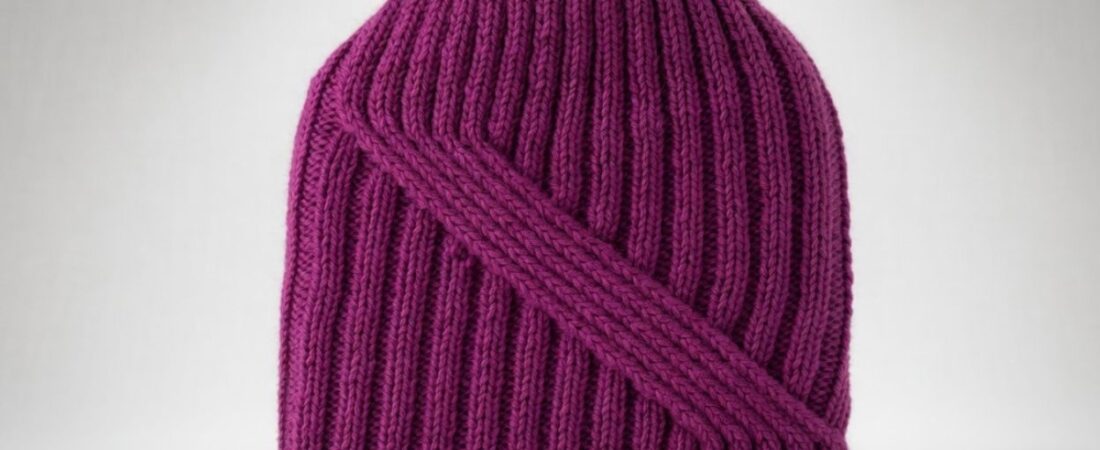
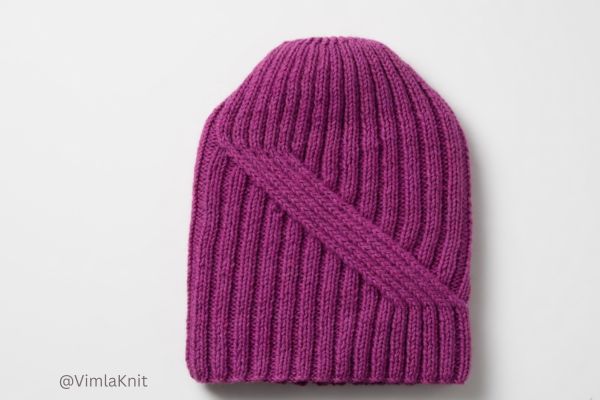
You can make this beanie for anyone of any age, but it looks especially attractive, stylish, and smart on men. This pattern is very simple to make, so even beginners can try it without any trouble. The entire ribbed knit beanie is made using 2×2 Rib Stitch, but we’ve added a few twisted stitches in the center to make it look more attractive and trendy. This small detail makes the beanie look unique, smart, and modern.
In this post, I’ll show you the complete step-by-step method. So, are you ready to make a Ribbed Knit Beanie Hat with me? Let’s get started!
Materials Needed for This Ribbed Knit Beanie
1- 3.25 mm straight needle.
2- Vardhman Woolista Merino Wool Yarn (4 ply/stranded, 8 ply thickness, 100% pure merino wool, Yardage approx. 180-200 mtrs per 100gm ball).
3- Other optional tools are a cable needle, tape measure, scissors, and yarn needle.
Beginner Knitting Abbreviations Guide
SL: Slip Stitch/Stitches
K: Knit
P: Purl
STS: Stitches/Stitch
RS: Right Side
WS: Wrong Side
K2tog: Knit 2 stitches together
P2tog: Purl 2 stitches together
T4F – K4: 2 sts on cable needle & hold in back, K2, K2 from cable needle
T4F – P2, K2: 2 sts on cable needle & hold in front, P2, K2 from cable needle
If you need help understanding the knitting terms used in this pattern, please check out the detailed knitting abbreviations guide for clear explanations and beginner-friendly instructions.
Free Ribbed Knit Beanie Pattern for Beginners
Casting on: 122 sts for brain hat with Vardhman Woolista Merino Wool Yarn/3.25 mm straight needle.
Finished Size & Fit: This finished ribbed knit beanie features a blend of classic ribbing and twisted stitches. The total length measures approximately 10 inches, consisting of a 2-inch ribbed brim, a 7.5-inch patterned body, and a 0.5-inch crown. Designed to fit head circumferences between 22 and 24 inches, this piece serves as a versatile, one-size-fits-most adult hat.
Skill Level: Beginner/Intermediate.
Pattern Language: English.
Techniques Used: Cast on 122 stitches. Work in 2×2 rib (K2, P2) until the brim measures 2 inches or the preferred length. Transition to the main pattern and continue until the piece reaches the desired length. For a standard fit, work until the total length measures 9.5 inches (including the 2-inch brim and 7.5-inch patterned section). Complete the crown shaping, then cut the yarn while leaving a long tail. Neatly sew the edges together using a mattress stitch or preferred seaming method to finish the hat.
Ribbed Brim Instructions for the Beanie Hat
The main body of this Ribbed Knit Beanie Hat is worked in 2×2 Rib Stitch, so the brim should also be knitted in the same 2×2 Rib Stitch pattern.
When the body and brim use the same stitch pattern, the beanie gets a clean, professional, and well-finished look. The 2×2 Rib Stitch is perfect for the brim because it offers excellent flexibility and stretch. The brim becomes nicely stretchy, which helps the beanie fit comfortably on the head and creates a secure grip. It stays in place nicely, feels cozy in cold weather, and doesn’t slip off easily.
The complete step-by-step instructions for knitting the brim are given below
Row 1(RS): * K2, P2 * repeat from * to * ………….. last 2 sts K2
Row 2(WS): * P2, K2 * repeat from * to * …………….. last 2 sts P2
Continue repeating these rows until the ribbed border measures approximately 2 inches. At this stage, a total of 18 rows have already been completed.
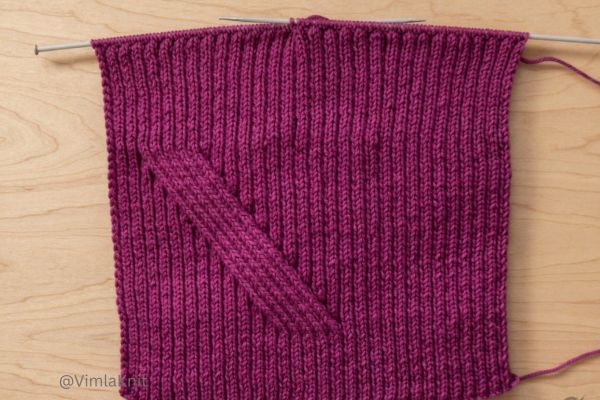
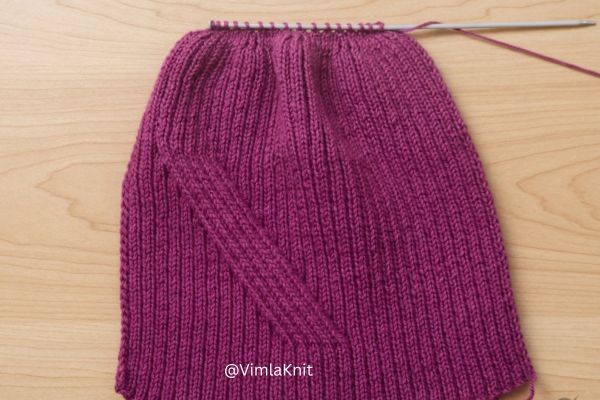
How to Knit the Main Body of the Beanie
Once you finish the brim length, we will twist some selected stitches. This simple twist creates a beautiful texture in the knitting. This small detail turns a basic beanie into a stylish and trendy Ribbed Knit Beanie Hat. You will find the exact details — which stitches and how many to twist — in the pattern section below.
Row 1: (K2, P2) 13 times, (T4F – K4), (T4F – P2, K2) 4 times, (K2, P2) 12 times, K2
Row 2: (P2, K2) 12 times, P4, (K2, P2) 3 times, K2, P4, (K2, P2) 13 times
Row 3: (K2, P2) 13 times, K2, ( T4F – P2, K2) 5 times, (P2, K2) 12 times
Row 4: * P2, K2 * repeat from * to * …………….. last 2 sts P2
Row 5: (K2, P2) 14 times, (T4F – K4), (T4F – P2, K2) 4 times, (K2, P2) 11 times, K2
Row 6: (P2, K2) 11 times, P4, (K2, P2) 3 times, K2, P4, (K2, P2) 14 times
Row 7: (K2, P2) 14 times, K2, (T4F – P2, K2) 5 times, (P2, K2) 11 times
Row 8: Same as row 4
Row 9: (K2, P2) 15 times, (T4F – K4), (T4F – P2, K2) 4 times, (K2, P2) 10 times, K2
Row 10: (P2, K2) 10 times, P4, (K2, P2) 3 times, K2, P4, (K2, P2) 15 times
Row 11: (K2, P2) 15 times, K2, (T4F – P2, K2) 5 times, (P2, K2) 10 times
Row 12: Same as row 4
Row 13: (K2, P2) 16 times, (T4F – K4), (T4F – P2, K2) 4 times, (K2, P2) 9 times, K2
Row 14: (P2, K2) 9 times, P4, (K2, P2) 3 times, K2, P4, (K2, P2) 16 times
Row 15: (K2, P2) 16 times, K2, (T4F – P2, K2) 5 times, (P2, K2) 9 times
Row 16: Same as row 4
Row 17: (K2, P2) 17 times, (T4F – K4), (T4F – P2, K2) 4 times, (K2, P2) 8 times, K2
Row 18: (P2, K2) 8 times, P4, (K2, P2) 3 times, K2, P4, (K2, P2) 17 times
Row 19: (K2, P2) 17 times, K2, (T4F – P2, K2) 5 times, (P2, K2) 8 times
Row 20: Same as row 4
Row 21: (K2, P2) 18 times, (T4F – K4), (T4F – P2, K2) 4 times, (K2, P2) 7 times, K2
Row 22: (P2, K2) 7 times, P4, (K2, P2) 3 times, K2, P4, (K2, P2) 18 times
Row 23: (K2, P2) 18 times, K2, (T4F – P2, K2) 5 times, (P2, K2) 7 times
Row 24: Same as row 4
Row 25: (K2, P2) 19 times, (T4F – K4), (T4F – P2, K2) 4 times, (K2, P2) 6 times, K2
Row 26: (P2, K2) 6 times, P4, (K2, P2) 3 times, K2, P4, (K2, P2) 19 times
Row 27: (K2, P2) 19 times, K2, (T4F – P2, K2) 5 times, (P2, K2) 6 times
Row 28: Same as row 4
Row 29: (K2, P2) 20 times, (T4F – K4), (T4F – P2, K2) 4 times, (K2, P2) 5 times, K2
Row 30: (P2, K2) 5 times, P4, (K2, P2) 3 times, K2, P4, (K2, P2) 20 times
Row 31: (K2, P2) 20 times, K2, (T4F – P2, K2) 5 times, (P2, K2) 5 times
Row 32: Same as row 4
Row 33: (K2, P2) 21 times, (T4F – K4), (T4F – P2, K2) 4 times, (K2, P2) 4 times, K2
Row 34: (P2, K2) 4 times, P4, (K2, P2) 3 times, K2, P4, (K2, P2) 21 times
Row 35: (K2, P2) 21 times, K2, (T4F – P2, K2) 5 times, (P2, K2) 4 times
Row 36: Same as row 4
Row 37: (K2, P2) 22 times, (T4F – K4), (T4F – P2, K2) 4 times, (K2, P2) 3 times, K2
Row 38: (P2, K2) 3 times, P4, (K2, P2) 3 times, K2, P4, (K2, P2) 22 times
Row 39: (K2, P2) 22 times, K2, (T4F – P2, K2) 5 times, (P2, K2) 3 times
Row 40: Same as row 4
Row 41: * K2, P2 * repeat from * to * ………….. last 2 sts K2
Row 42: * P2, K2 * repeat from * to * …………… last 2 sts P2
Repeat only Rows 41 and 42 until the beanie reaches your desired length. For reference, I knitted a total length of 9.5 inches, including a 2-inch brim and 7.5-inch main body section.
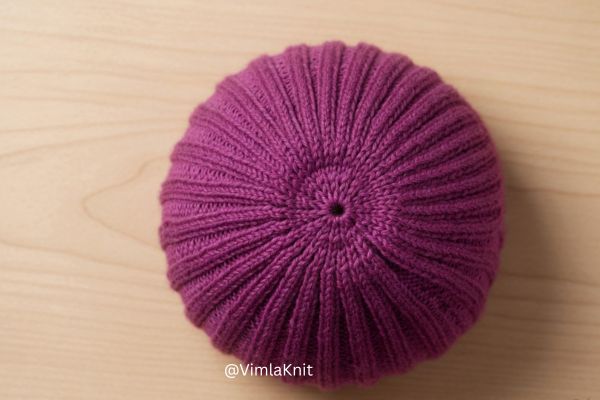
Shaping the Top of the Ribbed Beanie Hat
The main body of the beanie is now complete. It’s time to shape the crown. To give the beanie a nice rounded look, we will carefully decrease the stitches according to the pattern. This will make the beanie look professional and stylish. In this pattern, the crown shaping will be done in just 6 rows.
Row 1(RS): * K2tog, P2tog * repeat from * to * ……………. last 2 sts K2tog
Now I have 61 stitches remaining.
Row 2(WS): * P1, K1 * repeat from * to * ……………… last sts P1
Row 3(RS): SL1, K2tog, K2tog, K2tog ……………………
Now I have 31 stitches remaining.
Row 4(WS): Purl all sts
Row 5(RS): SL1, K2tog, K2tog, K2tog ……………………
Now I have 16 stitches remaining.
Row 6(WS): Purl all sts
After completing the crown decreases, you will have 16 stitches remaining on your needle. Cut the yarn, leaving a long tail, and thread it through a yarn needle or tapestry needle. Carefully pass the yarn through all 16 stitches and gently pull tight to close the top of the beanie neatly. Secure the crown firmly with a strong knot to keep it in place.
Next, sew the side seam of the ribbed beanie using mattress stitch or a simple backstitch for a clean and professional finish.
If you need help seaming your knitted beanie, be sure to check out the step-by-step tutorial for an easy guide.
Final Thoughts on This Easy Ribbed Beanie Hat Pattern
Hello Knitters! If you enjoyed this Ribbed Knit Beanie Hat Pattern for Beginners, please share this post with your friends and family. Your one share can help us reach more new knitters. We regularly share trendy, stylish, and easy knitting projects on our blog, specially for beginners like you.
If you have any questions, doubts, or suggestions about this beanie tutorial, feel free to leave a comment below. We will try our best to reply as soon as possible.
We will keep bringing more new, easy, and beautiful beanie knitting projects for you.
This tutorial ends here. See you soon with another fun beginner beanie project! Happy Knitting!
Ribbed Knit Beanie Pattern FAQ Guide
How wide is the ribbed brim?
The brim measures approximately 2 inches.
What stitch pattern is used in this beanie?
The beanie is mainly worked in a 2×2 rib stitch pattern with twisted stitches in the center.
Can I use this pattern for charity knitting?
Yes, this beginner beanie pattern is perfect for charity projects.
Is this pattern free?
Yes, this is a free ribbed knit beanie pattern for beginners.
Leave a Reply