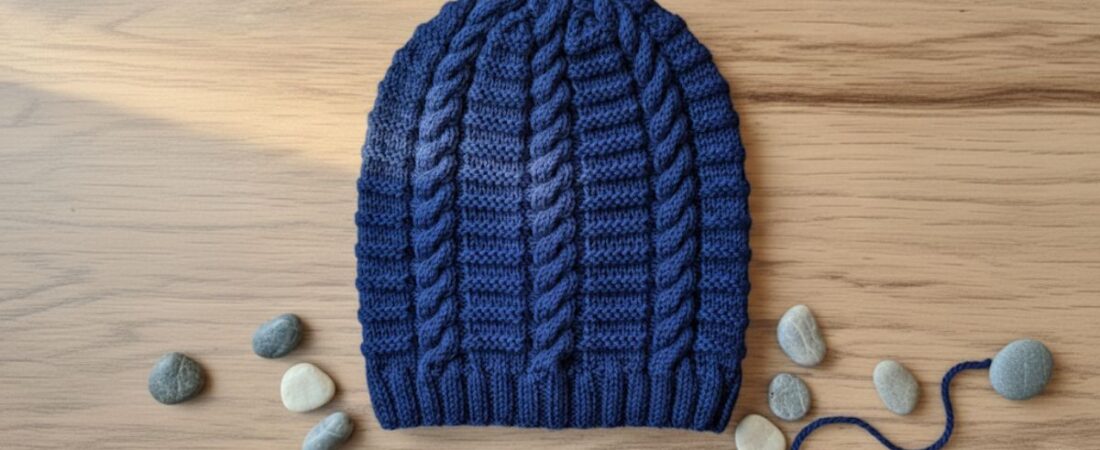
Hello friends! I’m thrilled to welcome you to my new blog, where we’ll explore the joy of knitting a beautiful ribbed cable beanie pattern together. I hope you are all happy and healthy!
Today, I have an elegant beanie for you. It has a simple ribbed cable pattern. As you know, a cable pattern makes any knitting project more beautiful and attractive. The cable design on this beanie really stands out.
I used simple straight needles for this. The next steps will give you a step-by-step tutorial on how to knit this beanie. So, let’s learn how to make this beautiful ribbed cable beanie!
Materials You’ll Need for Your Ribbed Cable Beanie
Knitting Wool: Vardhman Woolista Wool (4 ply/stranded/8 ply thickness, 100% pure merino wool, Yardage approx. 180-200 mtrs per 100gm ball).
Knitting Needle: For this beanie, two different sizes of straight knitting needles are used for the best fit and look. The brim is knitted with 3mm straight knitting needles. The main part of the hat, with the cable pattern, is made with 3.25mm straight knitting needles.
Other optional tools are a tape measure, scissors, cable needle, and yarn needle.
Common Knitting Terms and Abbreviations
For beginner knitters, those short words in a pattern can look like a secret code. But don’t worry! We have a step-by-step list of Knitting Abbreviations to help you out.
C6B: Cable of 6 sts from back (Slip 3 sts onto cable needle and hold behind work then K3 from left-hand needle then K3 from Cable needle).
SSK: Slip Slip Knit
K2tog: Knit 2 sts together
P2tog: Purl 2 sts together
SL: Slip Stitch/Stitches
K: Knit
P: Purl
STS: Stitches/Stitch
RS: Right Side
WS: Wrong Side
Check out the C6B (Cable 6 Back) stitch tutorial.
Ribbed Cable Beanie: A Step-by-Step Knitting Pattern
Cast on: 120sts
Sizes Available: One size (22-24 inches)
Skill Level: Easy/Beginner
Pattern Language: English
Techniques used: Basic knitting skills like casting on. A 2×2 rib stitch is used for the brim, and a ribbed cable pattern for the main part of the beanie. To shape the project, knitting stitches are decreased, and then the work is joined neatly to finish it.
How to Knit the Beanie Brim in Simple Steps
I used size 3 MM straight knitting needles to knit the brim of this ribbed cable beanie. Since this beanie knitting pattern has a cable pattern, we used a higher number of stitches.
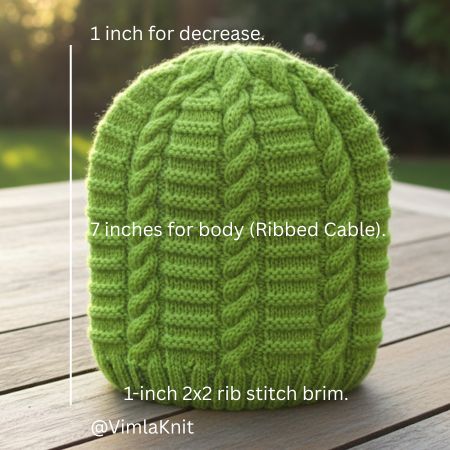
The brim is made with a simple 2×2 rib stitch. The length of the brim is 1 inch, but you can change it to be longer or shorter as you wish. See the brim knitting pattern below!
Note: Use 3 mm straight needle.
Row 1(RS): SL1(P) * K2, P2 * repeat from * to * ……last 3 sts K2, P1
Row 2(WS): SL1(P), * P2, K2 * repeat from * to * ………last 3 sts P3
Repeat these lines until your beanie has a 1‑inch brim. Remember, I have knitted a total of 10 rows so far.
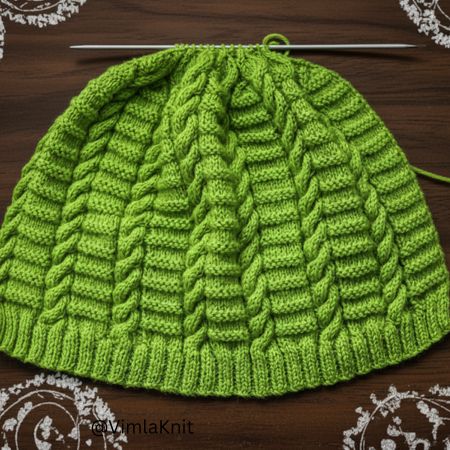
Easy Ribbed Cable Pattern to Knit Around the Beanie
For the cable pattern, we will use size 3.25 MM straight knitting needles. We will do this because we already have extra stitches from before, so instead of adding more stitches, we will use a bigger needle size.
This is a 6-row repeat cable pattern using 17 stitches. I used a multiple of 17 stitches and added one extra stitch at the end. This ribbed cable pattern is very easy and attractive. Below, you will see how I adjusted the pattern for the beanie.
Note: Use 3.25 mm straight needle.
Row 1(RS): * P2, K7, P2, K6 * repeat from * to * ………….. last sts P1
Row 2(WS): SL1(P), * P6, K2, P7, K2 * repeat from * to * ………… last repeat ending with P1 ( P6, K2, P7, K1, P1 )
Row 3(RS): Same as row 1
Row 4(WS): Same as row 2
Row 5(RS): * P11, C6B * repeat from * to * …………. last sts P1
Row 6(WS): SL1(P), * P6, K11 * repeat from * to * ………….. last repeat ending with K10 ( P6, K10,P1 )
Repeat these 6 rows to complete the length of your beanie. I knit my beanie to be about 8 inches long. This includes the 1-inch brim and 7 inches for the main body. I completed 12 full patterns to get this length.
Shaping Your Beanie: Decrease Instructions
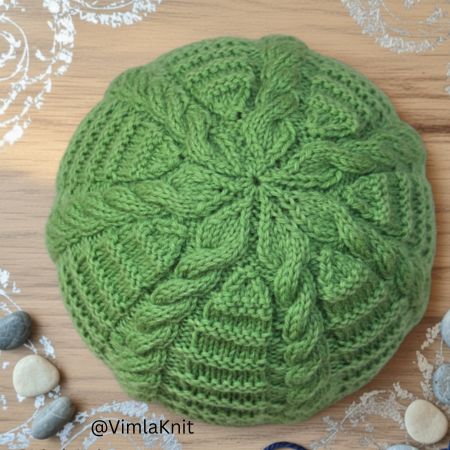
To shape the beanie, we will decrease the knitting stitches. This will be done by following the cable pattern. The beanie will look even more beautiful when the stitches are decreased this way. Below, you’ll find instructions on how to decrease the stitches.
Row 1: * P2, SSK, K3, K2tog, P2, K6 * repeat from * to * …………… last sts P1
Now I have 106 stitches remaining.
Row 2: SL1(P), * P6, K2, P5, K2 * repeat from * to * …………. last repeat P6, K2, P5, K1, P1
Row 3: * P2, SSK, K1, K2tog, P2, K6 * repeat from * to * ………….. last sts K1
Now I have 92 stitches remaining.
Row 4: SL1, * P6, K2, P3, K2 * repeat from * to * ………. last repeat P6, K2, P3, K1, P1
Row 5: * P2, P3tog, P2, C6B * repeat from * to * ………….. last sts P1
Now I have 78 stitches remaining.
Row 6: SL1, * P6, K5 * repeat from * to * ……………… last repeat P6, K4, P1
Row 7: * P2tog, P1, P2tog, K6 * repeat from * to * ………. last sts P1
Now I have 64 stitches remaining.
Row 8: SL1, * P6, K3 * repeat from * to * ………. last repeat P6, K2, P1
Row 9: * P1, P2tog, SSK, K2, K2tog * repeat from * to * ………. last sts P1
Now I have 43 stitches remaining.
Row 10: SL1, * P4, K2 * repeat from * to * ……….. last repeat P4, K1, P1
Row 11: * P2tog, SSK, K2tog * repeat from * to * ………… last sts P1
Now I have 22 stitches remaining.
Row 12: SL1, * P2, K1 * repeat from * to * …………. last 3 sts P3
Row 13: SL1, * K2tog, P1 * repeat from * to *
Now I have 15 stitches remaining.
Row 14: SL1, * P1, K1 * repeat from * to * ………… last 2 sts P2
All the remaining 15 stitches will be secured tightly with a string (or tapestry) needle. Then, by picking up the stitches on the edge of the beanie, we will seam the beanie up one side. Now our ribbed cable beanie is fully finished and ready to wear!
Congratulations! Your Beanie is Complete and Ready to Share!
Congratulations! Your ribbed cable beanie is now finished and ready to wear. This ribbed cable beanie is a great project that shows off your knitting skills.
I hope you enjoyed this knitting tutorial and that this easy ribbed cable beanie pattern was helpful! We would love to see your finished projects. Please share a picture of your beanie on our Facebook group and leave a comment below to let us know what you think. Happy knitting!
Beginner’s FAQ for Ribbed Cable Beanie Knitting Pattern
What is the finished size of this beanie?
This pattern fits most adults (head size 22–24 inches).
Can I knit this beanie in circular needles instead of straight?
Yes! The pattern is written for straight needles, but you can easily adapt it to circular needles if you’re comfortable knitting in the round.
Can I adjust the brim length?
Yes, absolutely! If you prefer a folded brim, you can knit a longer rib section before starting the cable pattern.
What knitting needles do I need?
For the brim: 3mm straight needles. For the body (cable design): 3.25mm straight needles.
3 responses to “Ribbed Cable Beanie Pattern: This Easy Cable Beanie is a Perfect Beginner Knit.”
-
love it
-
Would love to try this
-
Most welcome
-
Leave a Reply to Soniya Cancel reply